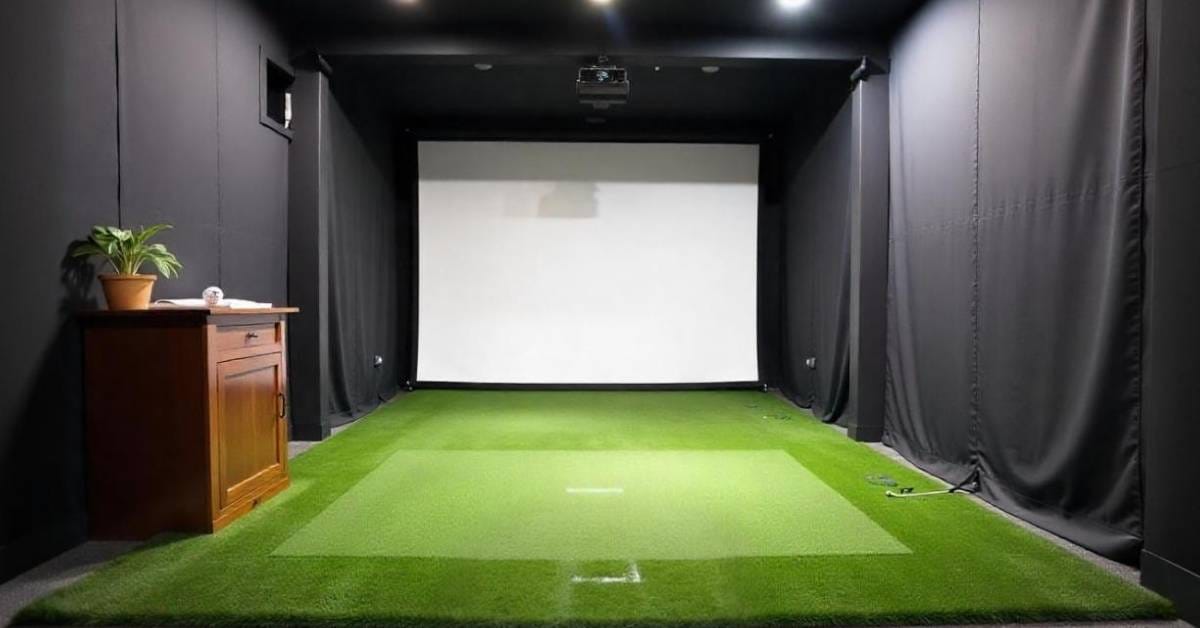
Golf simulators are no longer just for professionals or those willing to spend thousands of dollars. With the right combination of budget-friendly components, building a home golf simulator is more affordable and accessible than ever.
This guide covers the best budget golf simulator options, including a $1600 setup and a $3000 setup, along with a DIY solution for those who want to customize their build. Whether you’re looking for a complete package or assembling your own, you’ll find the right components to match your budget and needs.
With two detailed budget setups and a breakdown of DIY components, you’ll have everything you need to start practicing and improving your game from home without overspending.
What You Need to Build a Golf Simulator
- Launch Monitor – Tracks ball speed, spin, and distance.
- Impact Screen & Enclosure – Catches shots, displays projections, and contains stray balls.
- Hitting Mat – Simulates turf and protects the floor.
- Projector – Displays simulation visuals.
- Software – Runs virtual courses and shot analytics.
- Computer/Tablet – Runs the simulator software.
List of Best Budget Golf Simulators
- Best Budget Golf Simulator Under $1600
- Best Budget Golf Simulator Under $3000
- How to Build a DIY Golf Simulator
Best Budget Golf Simulator Under $1600
Building a golf simulator on a $1600 budget means focusing on the essential components that provide a functional and enjoyable experience without unnecessary extras. This setup includes everything needed to practice and improve your game while keeping costs under control. By selecting the right combination of equipment, you can create a realistic home golf setup without overspending.
| Product | Price ($) |
|---|---|
| Garmin Approach R10 Launch Monitor | $604 |
| BenQ TH575 Projector | $549 |
| GoSports Range Cage Impact Screen | $299 |
| Premium Turf Golf Mat | $149 |
| WGT Golf Software | Free |
| Total Amount | $1601 |
Launch Monitor – Garmin Approach R10
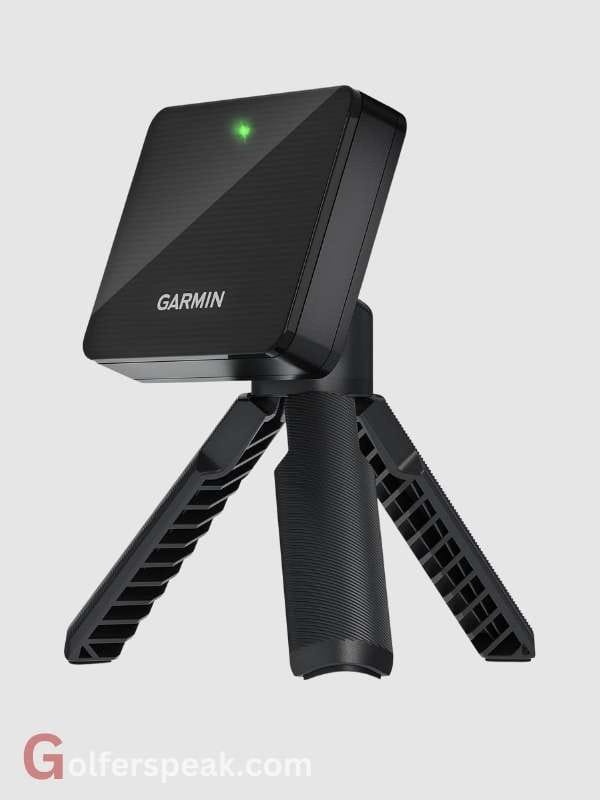
Garmin Approach R10
Pros:
Cons
A good launch monitor is the foundation of any golf simulator. After looking at several options, I went with the Garmin Approach R10, which comes in at around $600 and strikes a great balance between affordability and performance.
It’s compact and portable, yet it tracks ball speed, carry distance, and spin rate with impressive accuracy for its price.
While it doesn’t have the advanced metrics of higher-end models, for casual practice and simulator play, it’s more than enough. The added bonus? It works both indoors and outdoors, giving you flexibility in how and where you practice.
Projector – BenQ TH575
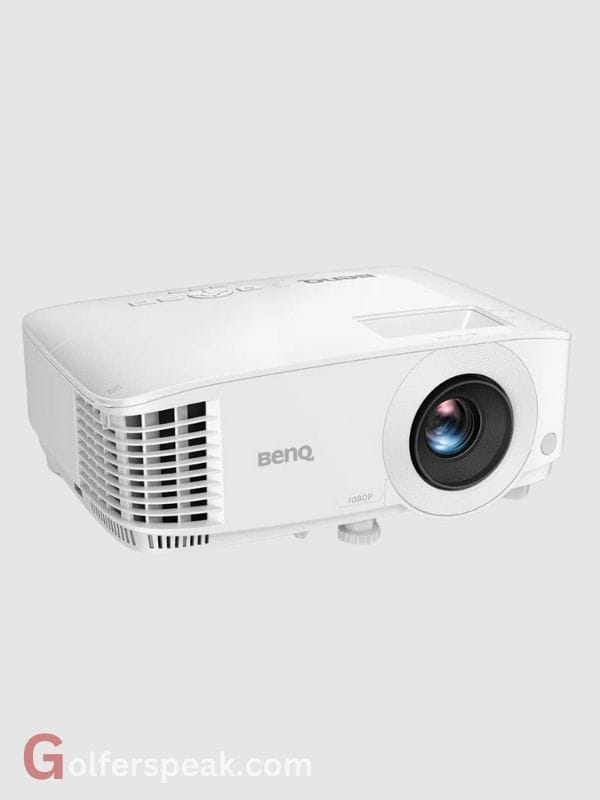
BenQ TH575 Projector
Pros:
Cons
After comparing multiple options, I found that the BenQ TH575 is one of the best budget-friendly projectors for a golf simulator.
For around $549, it offers 1080p resolution and 3,800 lumens of brightness, ensuring a clear and vibrant display, even in moderately lit rooms.
While it’s not specifically made for golf simulators, it works surprisingly well in this setup. It delivers a sharp, bright image on the impact screen and integrates well with the other components, making it a reliable and cost-effective choice.
Impact Screen – GoSports Range Cage

GoSports Range Cage with Impact Screen
Pros:
Cons
Finding a budget-friendly impact screen that holds up well wasn’t easy, but the GoSports Range Cage stood out. At about $300, it serves as both a protective net and a projection screen, making it a great fit for home setups.
Its sturdy design ensures safety, and its compact size makes it an ideal choice for smaller indoor spaces.
One thing I really like about this cage is how easy it is to set up. There’s no complicated installation process, and once it’s up, it stays in place.
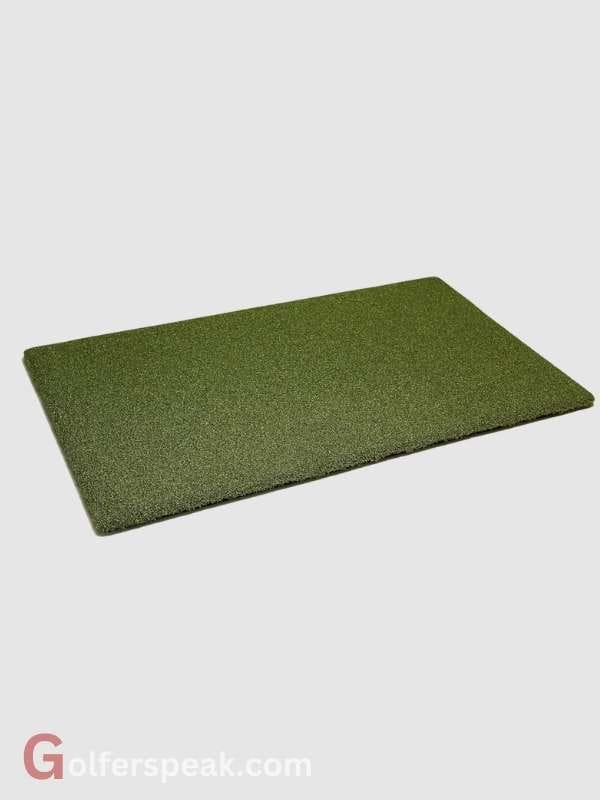
Hitting Mat – Premium Turf Golf Mat
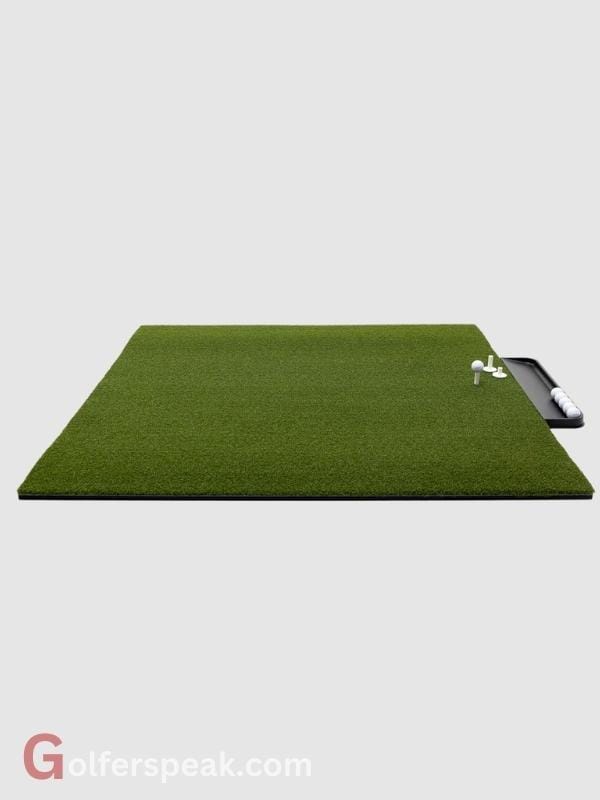
Premium Turf Golf Mat
Pros:
Cons
A hitting mat is one of the most important pieces of this setup, and I wanted something durable yet affordable.
This 4’x5′ mat with a 30mm thickness, priced at around $150, is a solid choice for budget-conscious golfers who still want a reliable practice surface.
While it doesn’t have the premium turf feel of high-end mats, it provides enough cushioning to protect your wrists and clubs while ensuring realistic ball contact. It blends seamlessly into this setup and is built to handle regular practice without wearing down too quickly.
Software & Computer
For software, WGT Golf is used as the primary option, providing a free way to start playing without any extra cost. It’s great for beginners who want to explore virtual golf without a major upfront investment.
For those wanting more advanced features, GS Pro is available for $250 per year, offering a wider range of courses, enhanced graphics, and additional functionality to elevate the simulator experience.
A computer or tablet is required to run the software. To keep costs low, this setup assumes you already have a compatible device. If you need an upgrade or don’t have one, check out my guide on choosing the best computers for golf simulators.
Best Budget Golf Simulator Under $3000
With $3000 to work with, I wanted to put together a simulator setup that delivers better accuracy, visuals, and durability without overspending. After a lot of research, I found that this combination of components gives you the best value while keeping the experience immersive and realistic.
| Product | Price |
|---|---|
| SkyTrak Launch Monitor | $995 |
| Golf Simulator Cage with Impact Screen | $699 |
| BenQ TH671ST Projector | $749 |
| Real Feel Golf Mat | $279 |
| GS Pro Software (Annual) | $250 |
| Total Amount | $2972 |
Launch Monitor – SkyTrak
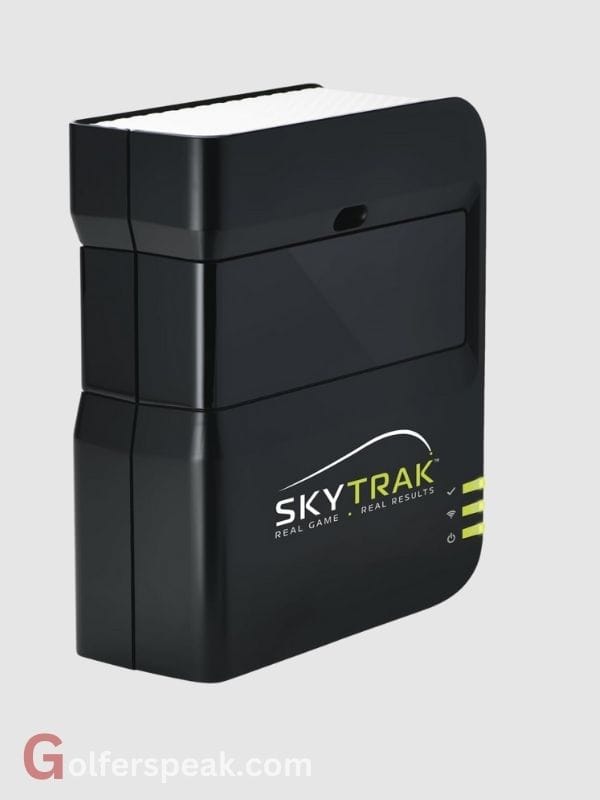
SkyTrak Launch Monitor
Pros:
Cons
When looking for a high-quality launch monitor, SkyTrak stood out as the best choice for this price range. At just under $1000, it provides detailed shot data like ball speed, launch angle, spin rate, and carry distance, which are all key to improving your game.
I also wanted a launch monitor that’s compatible with different simulator software, and SkyTrak checked that box.
It works with GS Pro, which means you can play realistic virtual courses, track your stats, and even compete online. Plus, it comes with a 30-day trial of Game Improvement Software, so you get instant access to practice ranges and skill-building features.
Impact Screen & Enclosure – Golf Simulator Cage
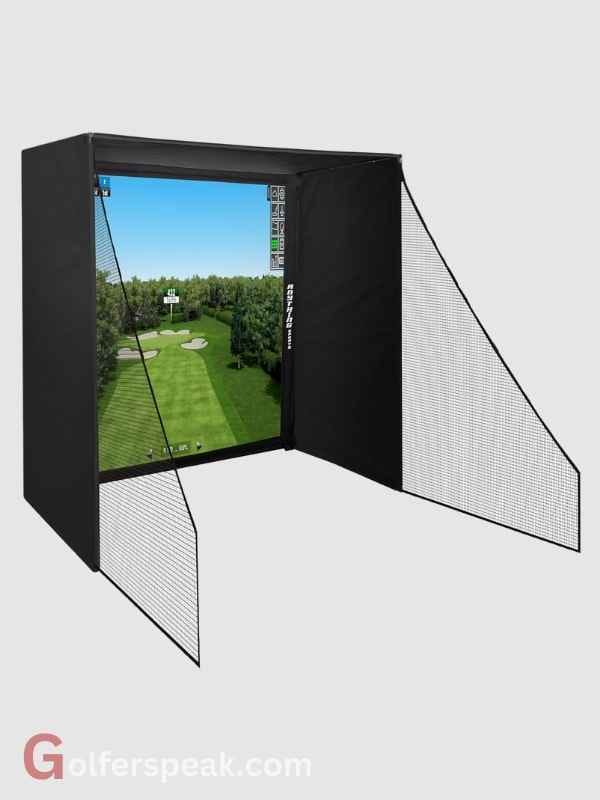
Golf Simulator Cage with Impact screen
Pros:
Cons
A simulator cage with an impact screen is a must-have for this setup. This enclosure costs around $700 and provides the right mix of durability and practicality.
Its sturdy netting and frame keep your simulator area safe, even when hitting full shots. Another big plus? It’s easy to set up, so you won’t have to spend hours putting it together before getting to the fun part—actually playing.
Projector – BenQ TH671ST

BenQ TH671ST Projector
Pros:
Cons
A good projector makes a huge difference in the simulator experience, and after looking at so many options, I settled on the BenQ TH671ST. It costs around $750, and since it’s a short-throw projector, you can position it close to the screen and still get a large, clear image.
With 1080p resolution, 3,000 lumens brightness, and a 16.67ms input lag, the visuals are sharp, immersive, and responsive, making simulator play feel much more realistic.
Whether you’re working on your swing or playing a full round, the smooth performance and crisp image quality enhance the overall experience.
Hitting Mat – Real Feel Golf Mat
Real Feel Golf Mat
Pros:
Cons
I wanted a hitting mat that feels as close to real turf as possible, and the Real Feel Golf Mat does just that. The 3’x5′ mat is designed to replicate the sensation of hitting off actual grass, giving you better feedback than most budget mats.
At about $280, it’s a great investment if you’re serious about improving your game. It’s also durable enough to handle thousands of swings, so you won’t have to worry about replacing it anytime soon.
Software & Computer
For software, I went with GS Pro, which costs $250 per year and provides realistic course graphics, smooth gameplay, and advanced shot analytics. It’s one of the most popular options among serious golfers, and after using it myself, I can see why.
Just like with the $1600 setup, I didn’t include a computer in this budget, assuming you already have one. If not, or if your current system needs an upgrade, I have a detailed article on the best computers for golf simulators.
How to Build a DIY Golf Simulator
Building a DIY golf simulator takes careful planning, choosing the right components, and optimizing your space for a realistic and efficient setup. Whether you’re creating a budget-friendly system or investing in a premium setup, each component plays a vital role in bringing your simulator to life.
Start by measuring your available space. Most setups require at least 10 feet of depth, 10 feet of width, and 8 feet of height to allow for full swings and accurate shot tracking.
Next, focus on choosing essential components like an impact screen or net, a hitting mat, and a launch monitor. These elements form the foundation of your simulator, ensuring accuracy and durability for long-term use.
Using a frame or enclosure, you can secure the screen and create a safe hitting area. To complete the setup, connect a projector or monitor to display your simulation software, making sure it’s properly aligned for the best visuals.
Finally, test everything to ensure functionality and accuracy, making adjustments as needed to create a personalized, budget-friendly golf simulator.
Essential Components for a DIY Golf Simulator
A DIY golf simulator gives you the flexibility to build a setup that matches your space, budget, and practice goals. Below is a detailed breakdown of the core components you’ll need, along with different budget-friendly and premium options.
1. Launch Monitor
A launch monitor is the most crucial component of any simulator. It tracks ball data such as speed, launch angle, spin rate, and carry distance, providing essential feedback to improve your game.
For budget-conscious golfers, portable launch monitors like the Garmin Approach R10 or Rapsodo MLM offer solid performance at a lower price.
If you’re looking for greater accuracy and simulation compatibility, options like SkyTrak or Mevo+ are excellent mid-range choices.
For serious golfers and professional setups, high-end monitors such as the Foresight GC3 or GCQuad provide elite-level precision, club data, and in-depth analytics.
| Launch Monitors | Features | Price |
|---|---|---|
| Garmin Approach R10 | Portable, 14+ metrics, virtual courses, long battery | $604 |
| Rapsodo MLM | Compact, accurate shot metrics, video feedback | $700 |
| SkyTrak | Photometric, precise ball data, shot analysis | $995 |
| FlightScope Mevo+ | Doppler radar, advanced metrics, simulation | $1840 |
| SkyTrak+ | Upgraded SkyTrak, better accuracy, faster processing | $2500–$3000 |
2. Impact Screen & Enclosure
An impact screen or net is necessary for indoor golf simulators, as it catches the golf ball safely and serves as the projection surface for simulator visuals.
For those on a tight budget, a DIY heavy-duty tarp or net can work as an affordable alternative.
Mid-range options, such as the GoSports Golf Net, function as both a safety net and a projection screen, making them versatile and practical.
If you’re looking for better durability and premium projection quality, Carl’s Place impact screens are ideal for high-end setups, ensuring sharp visuals and long-lasting performance.
| Impact Screens/Nets | Features | Price |
|---|---|---|
| GoSports Range Cage Impact Screen | 10′ x 8′ cage, shank nets, top netting, high-density | $300 |
| Golf Simulator Cage | 108″ x 168″ screen, full enclosure kit, easy assembly (conduit not included) | $699 |
| GoSports Golf Simulator Enclosure | Premium projection surface, durable build, immersive experience. | $1200 |
| Elite Screens Golf Impact Screen | Portable, ball return, easy practice setup. | $1625 |
3. Hitting Mat
A hitting mat is a crucial component of a golf simulator setup. It protects your flooring, provides a stable surface for hitting shots, and ensures realistic ball contact. A poor-quality mat can lead to wrist strain or an unnatural feel, so choosing the right one is important.
For budget setups, a DIY artificial turf mat can serve as a low-cost solution, but it lacks durability and may not replicate real turf well. If you’re looking for a better experience, premium turf mats offer a softer feel and better feedback on your shots.
Mid-range mats like the Fiberbuilt Flight Deck provide a balance of affordability and performance, offering decent cushioning and a more turf-like feel. For a more authentic experience, Real Feel Golf Mats are among the best options, designed to mimic natural fairway turf while withstanding thousands of swings.
| Hitting Mats | Features | Price |
|---|---|---|
| Premium Turf Golf Mat | Custom sizes, affordable, versatile | $149 |
| Real Feel Golf Mat | Durable, realistic turf, supports real tees | $279 |
| Original Country Club Elite Golf Mat | True divot action, real tees, impact absorption | $599 |
| Fiberbuilt Golf Mat | High durability, turf-like feel, impact reduction | $948 |
4. Projector or Monitor
A projector or monitor is necessary to display the simulation software and bring your virtual golf experience to life. The choice between a monitor and a projector depends on your budget, space, and overall goals.
For budget setups, repurposing a TV or computer monitor is the cheapest solution. While this option works well, it may lack the immersive feel of a large projected image. If you have limited space, a short-throw projector is a great option as it projects a large image from a short distance, making it ideal for indoor simulators.
The BenQ TH575, for example, is a highly-rated short-throw projector that delivers a sharp, bright 1080p image, even in compact room. If you’re on a tighter budget, the Epson Home Cinema 880 provides a decent display at a lower cost, though it may not have the same short-throw capabilities.
A good rule of thumb is to choose a projector with at least a 1080p resolution and high lumens (brightness) for a clear, bright display in different lighting conditions.
| Projectors | Features | Price |
|---|---|---|
| BenQ TH575 Projector | 1080p, 3800 lumens, low input lag, great for budget golf simulators | $549 |
| BenQ TH671ST Projector | 1080p, 3000 lumens, short-throw, minimal lag, ideal for compact golf setups | $749 |
| ViewSonic LS740HD | 1080p, 5000 lumens, laser, bright for well-lit golf simulator rooms | $950–$1100 |
| ViewSonic LX700 | 4K, RGB laser, 300″ display, 240Hz, ultra-smooth visuals for premium golf sims | $1400–$1600 |
5. Software
The right simulator software can make a huge difference in how engaging and realistic your golf simulator feels. Software provides virtual courses, practice ranges, and analytics, allowing you to track your progress and improve your game. If you’re unsure which one suits your needs, my guide on Simulator Software with a comparison can help.
For beginners and budget-conscious golfers, WGT Golf is a great free option. It offers basic virtual golf experiences but lacks advanced analytics and multiplayer features.
If you’re looking for more detailed shot tracking and a better selection of courses, GS Pro ($250 per year) is a fantastic mid-range choice, known for its realistic ball physics and compatibility with multiple launch monitors.
Premium software options like E6 Connect and TGC 2019 provide ultra-realistic graphics, advanced analytics, and online multiplayer modes, making them ideal for serious golfers who want the most detailed simulation possible.
| Simulation Software | Features | Price |
|---|---|---|
| WGT Golf | Free, basic simulation with limited courses | Free |
| GS Pro | Realistic course simulations, in-depth analytic | $250/year |
| E6 Connect | Premium courses, advanced tools, multiplayer | $300/year |
| TGC 2019 | Realistic graphics, multiplayer, vast course library | $950 |
6. Computer
Last but not least, the computer is what brings everything together, ensuring smooth gameplay, accurate shot tracking, and realistic visuals. Without enough processing power, even the best launch monitor and software won’t perform at their full potential.
At a minimum, an Intel Core i5 or AMD Ryzen 5 processor is required, but for advanced software like GS Pro, E6 Connect, or TGC 2019, an Intel Core i7 or Ryzen 7 delivers faster performance and a more responsive experience.
A dedicated graphics card is also essential. NVIDIA GTX 1070 or higher ensures smooth visuals, while an RTX 3060 or better enhances frame rates and image quality.
Memory and storage impact overall performance, with 8GB RAM as the minimum, though 16GB RAM is ideal for smoother multitasking. An SSD significantly improves load times compared to an HDD, making software more responsive. Since most golf simulation software is optimized for Windows 10 or 11, make sure your system is compatible to avoid technical issue.
For desktop vs. laptop, desktops typically offer better performance and upgradeability, making them ideal for permanent setups. Laptops work well for portability, but high-performance models are more expensive.
A budget setup should include an Intel i5, GTX 1070, and 8GB RAM, while a mid-range system with an i7, RTX 3060, and 16GB RAM enhances performance. A high-end system with an i9, RTX 3080, and 32GB RAM provides top-tier visuals and fast processing.
Investing in the right computer ensures a seamless, immersive golf simulation experience. If you need help selecting the best system, my guide on the best computers for golf simulators provides a detailed breakdown of options to suit different needs and budgets.
Final Thoughts
Setting up a golf simulator requires careful planning and the right component choices, but the results are well worth it. This guide covers affordable setups under $1600 and $3000, along with DIY options for a fully customized experience.
Each setup is designed to balance cost and performance, allowing you to build a simulator that fits your budget, space, and practice goals. Whether you’re a beginner or looking to upgrade your home setup, now is the perfect time to bring the golf course indoors.
Affiliate Disclosure: This article contains affiliate links, meaning I may earn a small commission if you purchase through these links, at no extra cost to you. These commissions help support the creation of quality content. I appreciate your support!